 Earlier this year, I embarked on a kitchen refresh that’s become lengthier than projected (read: it’s just now wrapping up). A cabinetry and appliance swap-out morphed into months of living in limbo amidst plaster dust, taped floors and washing dishes in my bathroom sink.
And I’ve struggled with it.
The has question nagged: how can I keep a sense of order while living in disorder? I like structure and I crave organization. (Just ask my mother; apparently as a kid, I couldn’t start my homework until my room was spotless).


The experience has been an exercise in flexibility to say the least, letting things go and being at peace in the moment. That being said: sitting around waiting isn’t my style.
 Enter new project: my 2nd bedroom closet. What once housed Christmas decor, class projects and suitcases is being transformed into a desk nook ready for writing and designing.
So far the essentials are in place: my contractor blew out the interior, my millworker PHAW fabricated an oak desk to provide lots of workspace, and I’ve installed sconces from Schoolhouse Electric for a classic look. But the white walls begged for some visual interest, so I committed to doing an accent wall, something I’ve thought about for years.
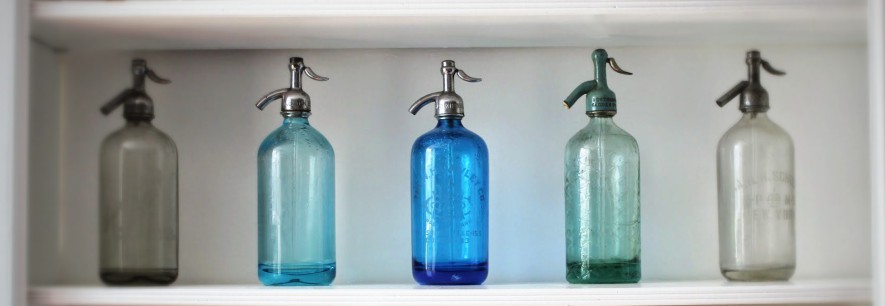
To plan, I pulled inspiration from everywhere: wallpapers, tile patterns, furniture. I wanted a bold geometric look, which can done in a small space with little risk. 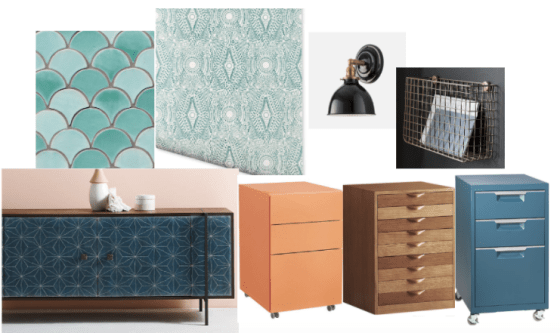 But I wanted it to be all mine, original. So I sketched some patterns and opted for a triangular geometric repeat, which I eventually transferred onto the wall (about a gazillion times?) via a stencil I made from scratch (scroll for more details).


Once the wall was fully covered with my pattern, I got down to the business of painting, filling in each geometric shape with varying mixtures of greens and blues and teals, diluting the acrylics with enough water to mimic the look of watercolor.
At this point, my sanity was surely in question. But the whole thing was a blast. As I progressed, I got lost in the painting – in a good way – not thinking about the outcome, but enjoying the way the paint soaked into the flat white walls. My mind could wander as I focused on the task, distracting me from whatever was ailing me that day: heartbreak, self-doubt, you name it; this proved a perfect antidote.


I was suddenly a 14th century frescoe painter, feeling what they must have felt placing watery paint on chalky plaster. And then a flash of connection to my grandmother, who painted ceramics for years. I now understood the satisfaction she had putting paint on blank figures all those years in her quaint little kitchen.
As I worked to fill each tiny shape, the paint dried to a finish beyond my power. While my pattern itself was rigid and controlled, inside each shape lie a bit of crazy, a little bit of kismet: fate determined how each stroke would dry.
Turns out, my wall is a little bit controlled, and a little bit wild. Like me. The two can indeed coexist, and that can be a beautiful thing.
For more scoop on the step-by-step, see below. 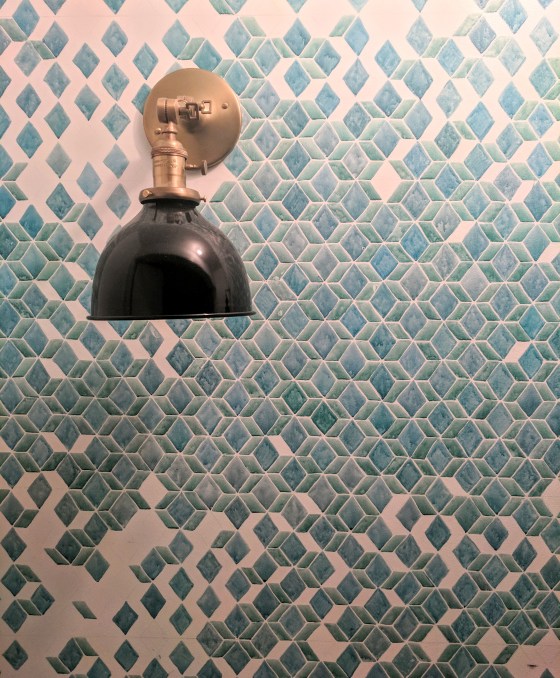 1 – Gather inspiration. See above!
2 – Pattern development. To get started, I sketched out simple grids, experimenting with repeats and ratios, using my ruler and triangles. I opted for a 1.5″ x 2″ repeat. You get the drift. #math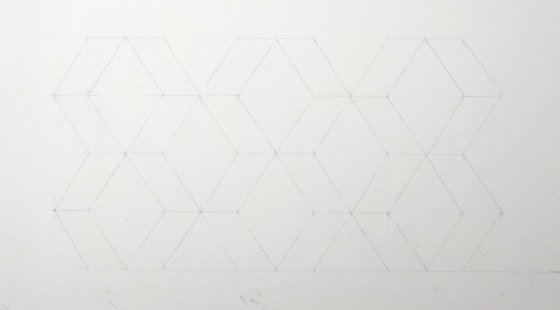
3 – Paint Testing. I played around with acrylics on poster board that I could place in the closet to stare at for a few weeks. Mostly so I could nail the blue-to-green color ratios. BUT also so I could stall.

Makeshift art table!
When I had a good pattern going, I photographed it and drew up a mock in Photoshop. (Can you see how far I got in Photoshop class?) It gave me the green light to move forward. 4 – Stencil creation & application. I transferred my finalized pattern onto a blank plastic stencil sheet. I then cut out key lines in the pattern with a straightedge (without cutting all the way through at the ends of each shape). I taped it to the wall and traced until the wall was filled. Tip: A long level is key here each time you tape up the stencil).
 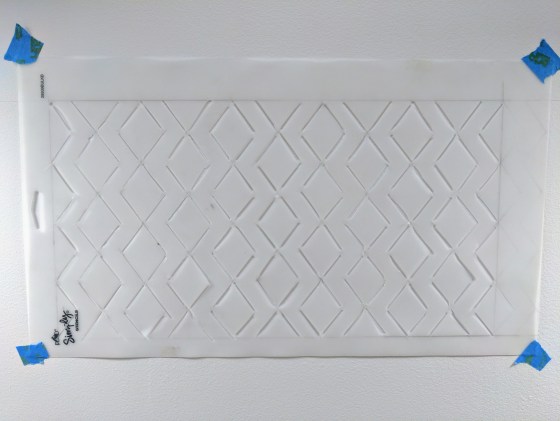 5 – Painting. I put “paint to wall” in an inconspicious place to see how things would look. Using the inexpensive acrylics was somewhat freeing, as I didn’t worry too much about messing up – and they also mimix the look of watercolor when mixed with enough water.


The final result? If only I had one! Stay tuned…

Great writing!!! Did you ever think about writing a book? I don’t think you’d have any trouble picking a subject!
Sent via the Samsung Galaxy S® 6, an AT&T 4G LTE smartphone
LikeLike